At work I built an automatic wire cutter for cutting out many lengths of wire on some panels.
I don't have any pictures of the actual machine, just the controller I made.
The controller is built around a Sparkfun Microview which is an arduino with a small oled screen on top inside a nice case. I used this since I had it laying around.
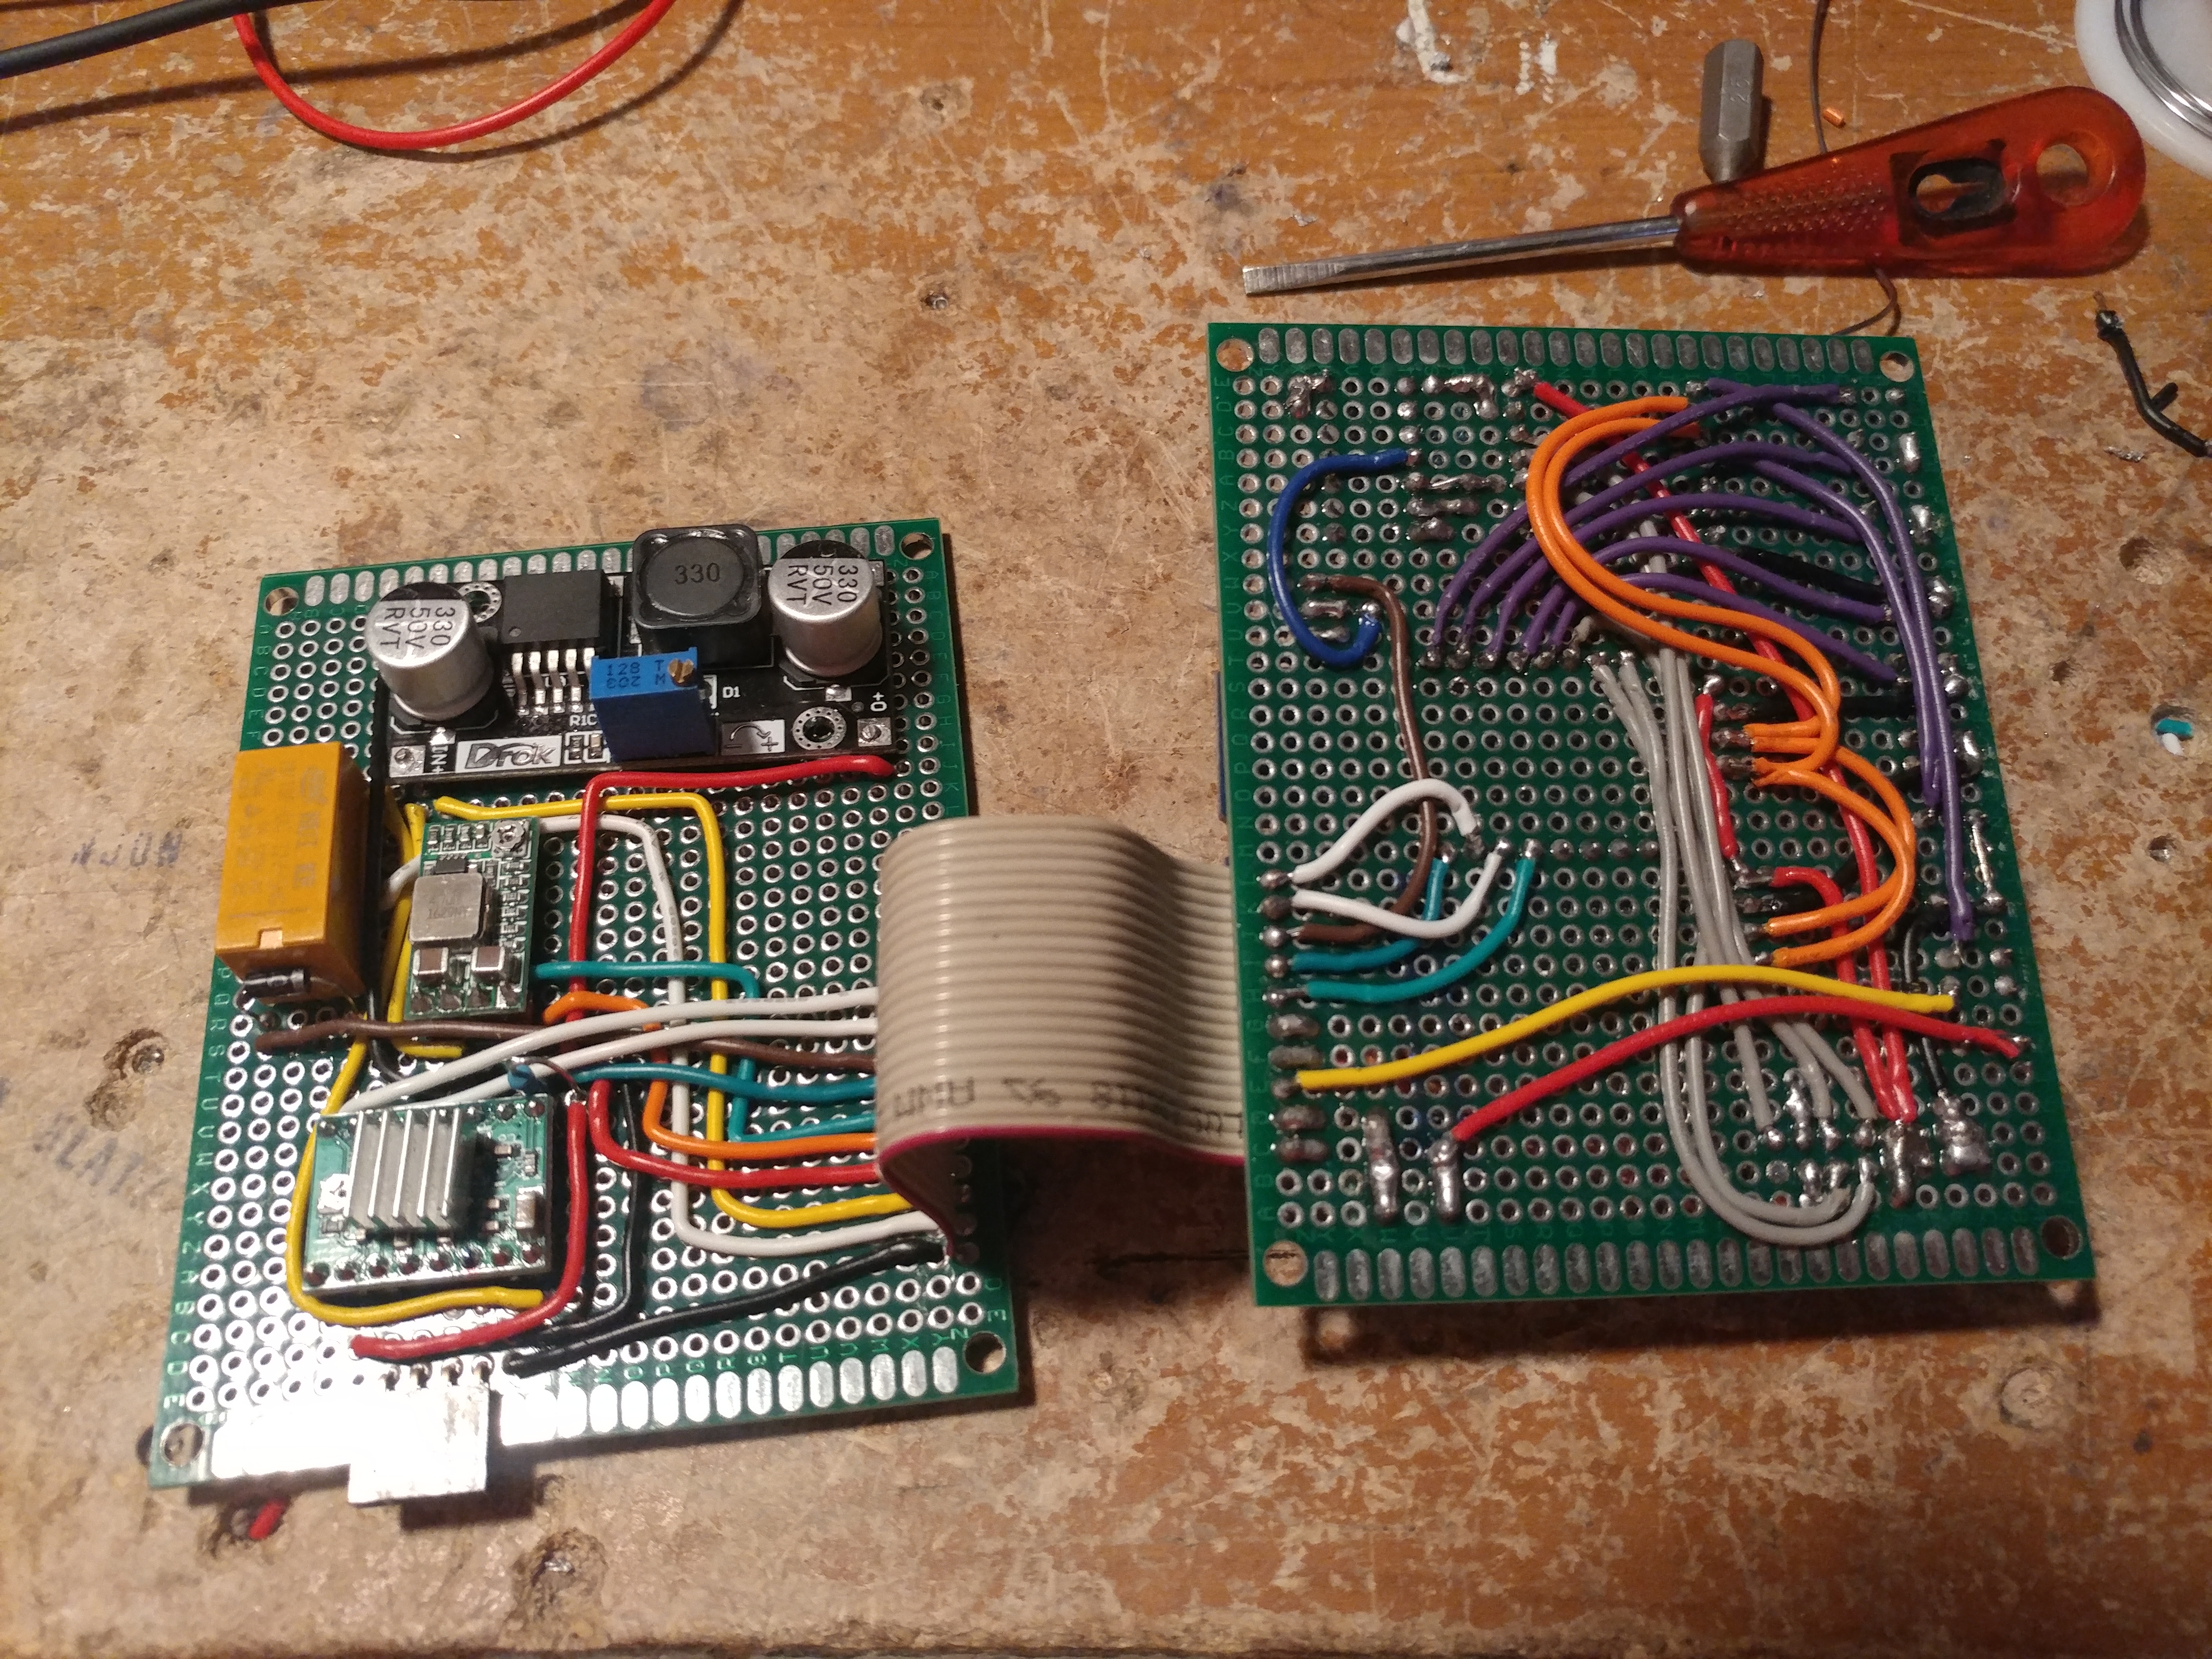
I built the controller using two pieces of protoboard. The upper board is the arduino, I/O expanders, and user interface.
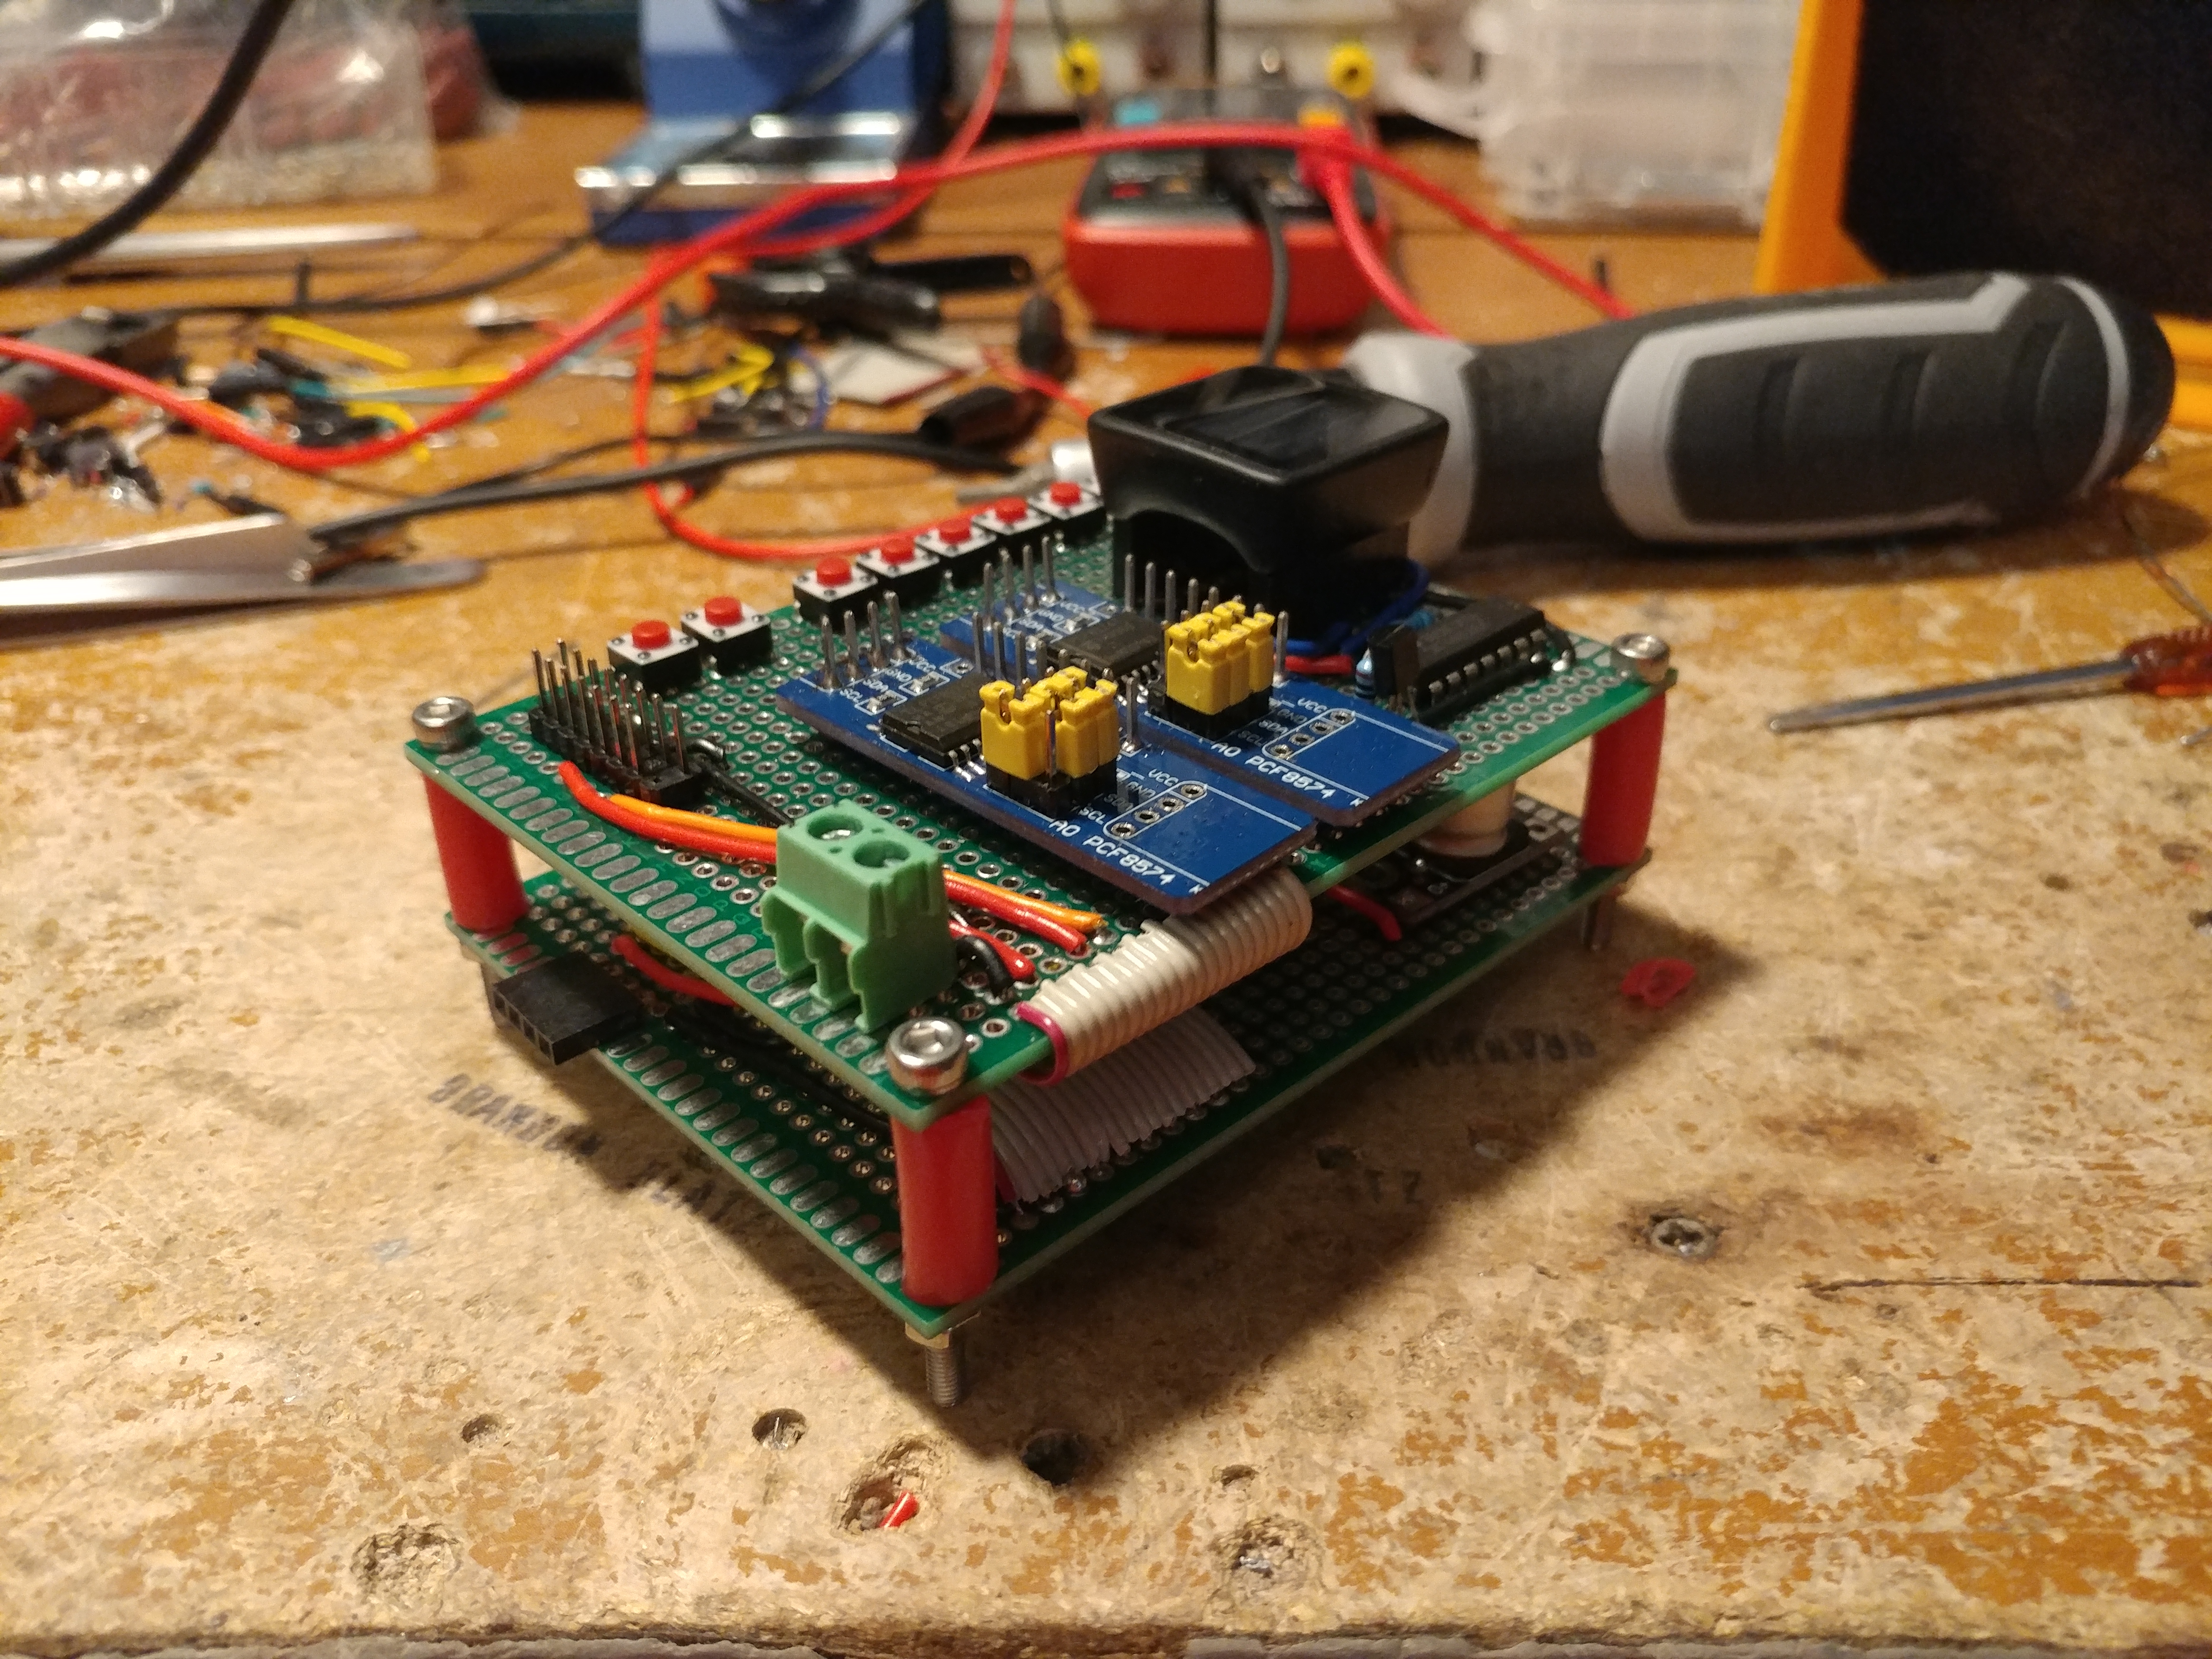
The bottom handles the 12V relay, power supplies, and stepper driver. I'm using a small buck/boost converter to step the 12v battery voltage down to 5V for the arduino. The larger converter is also making 5V but is dedicated to the stepper motor driver since I'm running it pretty close to it's limits. This never spends very long amounts of time turned on, so I'm not worried about the stepper motor overheating.
The board needed to monitor 3 optical sensors along the wire path as well as an optical encoder to measure the wire length. The wire was driven through the machine by a stepper motor. I wanted soft power buttons on this so that once it was done dispensing wire it could turn itself off after 15 minutes. One problem with soft power is that it will still draw a little bit of current so I chose to use a relay instead. With arduinos when they first power on all the I/O pins will go high and then low. This would cause a problem if you were to use one of those to control a relay to cut power to the arduino.
My solution was to have 2 I/O pins go to an XOR gate. The output of the gate would then go to the relay.
When you press the on button, it bypasses the relay and latches it on through the XOR gate which allows the arduino to start up and function. When the arduino wants to shut off, it will take one of the two pins HIGH while the other one is LOW. This will cause the XOR gate to output a HIGH signal. The XOR goes to an NPN transistor to the negative side of the relay.
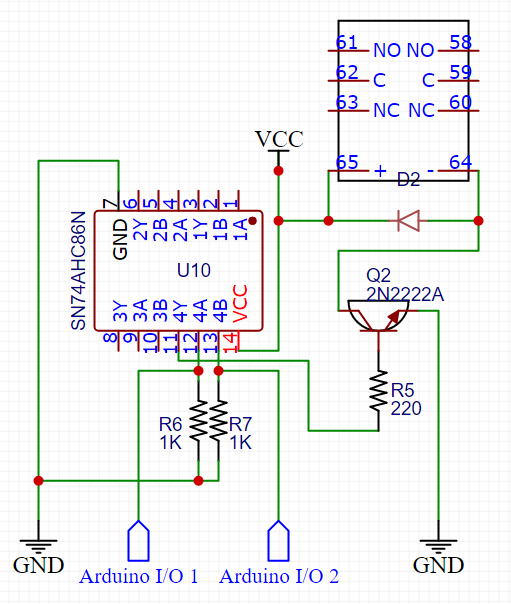
I've used this trick on a few other arduino based projects. It's a cheap and easy way to completely isolate your circuit from power when it needs to turn off.